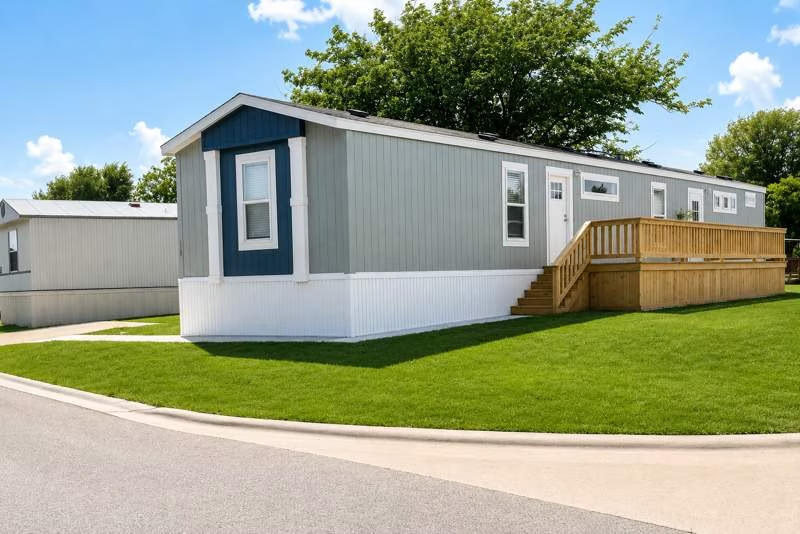
A manufactured home move is not just a delivery date. It is a coordinated process involving the homesite, utility connections, transportation access, permits, and the standards of the community you are joining. This guide to home site preparation helps you understand what needs to happen before your home arrives, so move-in day feels organized rather than overwhelming.
For homeowners bringing a manufactured home into a community, preparation protects your investment from the start. A ready site supports safe installation, helps avoid costly delays, and contributes to the clean, well-kept neighborhood experience residents expect.
Start With Community Approval and a Clear Plan
Before arranging a move, confirm that the home and the lot are a good match. Manufactured home communities may have requirements for home age, size, condition, exterior appearance, skirting, landscaping, and installation. These standards are not meant to create unnecessary obstacles. They help protect property values, maintain a welcoming environment, and make sure each homesite works safely with community infrastructure.
Contact the community management team early. Ask what information they need about your home, such as the year, manufacturer, dimensions, photographs, title documentation, or proof of insurance. You should also ask which parts of site preparation are managed by the community and which responsibilities belong to you, your transporter, installer, or utility providers.
This conversation should happen before you sign a moving contract. A transporter may be available on a certain date, but that date is only useful if the lot is approved, access is clear, and the installation work can be completed on time. At Medallion Communities, attentive site planning supports the well-managed, neighborly setting residents value.
Confirm the Site Can Support Your Home
A site may look open and level from the street, but proper evaluation goes much further. Your installer or qualified site professional should verify the home’s dimensions, orientation, required setbacks, and foundation or pier plan. They also need to account for local building codes and the manufacturer’s installation instructions.
Check measurements, grade, and drainage
The lot must have enough room for the home, steps, utility connections, and any required clearances from roads, neighboring homes, or property lines. The home’s position matters. A few feet can affect where the front door faces, whether the driveway remains usable, and how easily utility crews can complete their work.
Grade and drainage deserve special attention. Water should flow away from the home rather than collect beneath it or near the foundation. A site that needs grading, fill, or drainage improvements should be addressed before installation. Waiting until after the home is set can make the work more difficult and expensive.
Soil conditions can also affect foundation requirements. Local rules and the installation plan determine the correct support system, including piers, footings, anchors, and tie-downs. Do not assume that a nearby homesite uses the same setup. Conditions can vary across a community and between jurisdictions.
Understand who handles the foundation work
In many cases, a licensed installer coordinates the foundation system and securing the home. In others, site work may involve separate contractors. Get the scope of work in writing, including who supplies materials, obtains inspections, schedules crews, and corrects issues if the site is not ready.
The least expensive quote is not always the best choice. A contractor who understands manufactured home installation, local codes, and the community’s requirements may prevent delays that cost far more than the initial savings.
Prepare Utilities Before the Home Arrives
A home cannot become comfortable, safe housing until essential services are properly connected. Confirm the location and readiness of electric, water, sewer, gas, and communications services well before delivery. The exact utility setup depends on the community, home type, and local providers, so avoid making assumptions based on a previous address.
Electric service may require a meter pedestal, service equipment, or inspection before the provider can energize the home. Water and sewer connections need to align with the home’s plumbing layout. If gas service is available, qualified professionals must handle the connection and testing. Internet and cable can often be scheduled later, but it is wise to know available providers and installation timelines before move-in.
Ask each provider what must be complete before they can schedule service. Some need an account in the homeowner’s name, a final address assignment, a permit, or proof that installation has passed inspection. Keep the names and contact information for every utility representative in one place. A simple checklist can save several phone calls during an already busy week.
Make Delivery Access Safe and Clear
The route to the homesite is as important as the lot itself. Transport crews need adequate road width, turning space, and overhead clearance for the home sections and equipment. Low tree limbs, parked vehicles, temporary construction materials, or narrow turns can stop a delivery before it reaches the lot.
Walk the route with the transporter when possible. They can identify concerns such as steep grades, tight corners, overhead lines, soft ground, or areas where traffic control may be needed. If branches must be trimmed or obstacles moved, secure permission and complete the work in advance. Never ask a delivery crew to make unsafe adjustments on the spot.
Weather is another practical consideration. Heavy rain can soften an unpaved area, and freezing conditions can affect excavation or concrete work. A move schedule should include some flexibility, especially when site work depends on weather or inspection availability.
Plan for Permits, Inspections, and Documentation
Permits and inspections can feel like paperwork, but they are safeguards for your home and household. Requirements vary by state, county, city, and community. Depending on the location, permits may be needed for installation, electrical work, plumbing, decks, steps, or other improvements.
Confirm who is responsible for obtaining each permit. Your installer may handle installation permits, while a separate contractor handles a porch or shed. Keep copies of permits, inspection results, installation records, warranties, and contractor agreements. These documents can be useful for future maintenance, insurance questions, refinancing, or a later sale.
Do not schedule the final stages of your move around an assumed inspection date. Inspectors may have limited availability, and corrections can be required. Build time into your plan so a small adjustment does not force your household into a rushed decision.
Prepare for the First Week After Set-Up
Once the home is installed, there are still a few important details to complete. Your installer should finish leveling, anchoring, weatherproofing, and required connections according to the approved plan. Before moving in, walk through the home and site carefully. Check that doors and windows operate correctly, utilities are working, steps and handrails are secure, and skirting is installed as required.
This is also the right time to understand community procedures. Learn where to place trash, how to report maintenance concerns, where guests may park, and any guidelines for pets, outdoor items, landscaping, or improvements. Clear expectations help every resident enjoy a safer, more attractive neighborhood.
A prepared homesite is more than a technical requirement. It is the first step toward settling into a home and a community where you can build routines, know your neighbors, and feel proud of where you live. Give the planning process the time it deserves, and you will be ready to enjoy the day your new home becomes part of the neighborhood.